
 RamTV
RamTV  XazTube
 Content
Storage
Keeping media off-server on FTP, S3 or Spaces
Officially supported storages:
| Platform | Storage price ( per 1tb ) | Delivery price ( per 1tb ) |
| Bunny.net | $10* | $5* |
| Storj.io | $4* | $8* |
| Backblaze.com | $5* | $10* |
| Wasabi.com | - | $7* |
| CDN777.com | $20* | $33* |
| AWS CloudFront | ? | ? |
| CloudFlare R2 | ? | ? |
| MinIO ( Self Hosted ) | - | - |
* Prices are rough estimates
Any AWS or FTP compatible storage works!
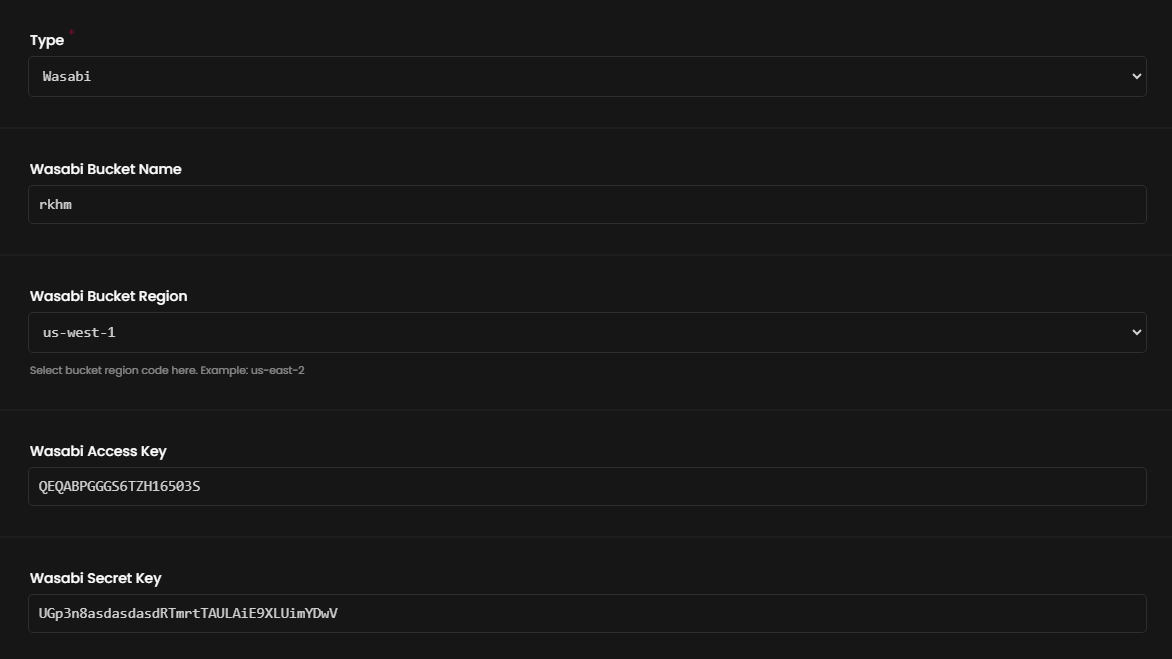
How to add Wasabi?
- Create a bucket. You can set any name or choose any region. enabling Bucket Versioning or Bucket logging is not necessary. Docs
- Enable public access to your bucket. Docs
- Create a new root access key. Copy the Access Key & Secret Key. Docs
- Go to RKHM's `Admin -> Setting -> Files -> Storage Server` and click on `+ New Item`
- Enter any name, choose Wasabi from `Type` option. Enter required information and click on `create`
- Go to RKHM's `Admin -> Setting -> Files -> Storage Setting` and set your new storage as default storage for ALL files or set it for whatever you like
How to add Bunny?
- Create a storage zone ( Bunny dashboard -> Storage -> + Add Storage Zone ). Enter any name. Select `Standard` as Storage tier, you don't need SSD for multimedia storage. Select a region, closest to your users' location. Geo Replication is not necessary
- You are redirected to a new page, Copy your username & password in FTP & API Access page
- Create a pull zone ( Bunny dashboard -> CDN -> + Add Pull Zone ). Enter any name. Select `Storage Zone` as Origin Type and select your Storage zone that you just created. Select `Standard tier` for Choose tier option - unless you have high volume traffic - and choose the location closest to your users' location in Pricing Zones and create the pull zone
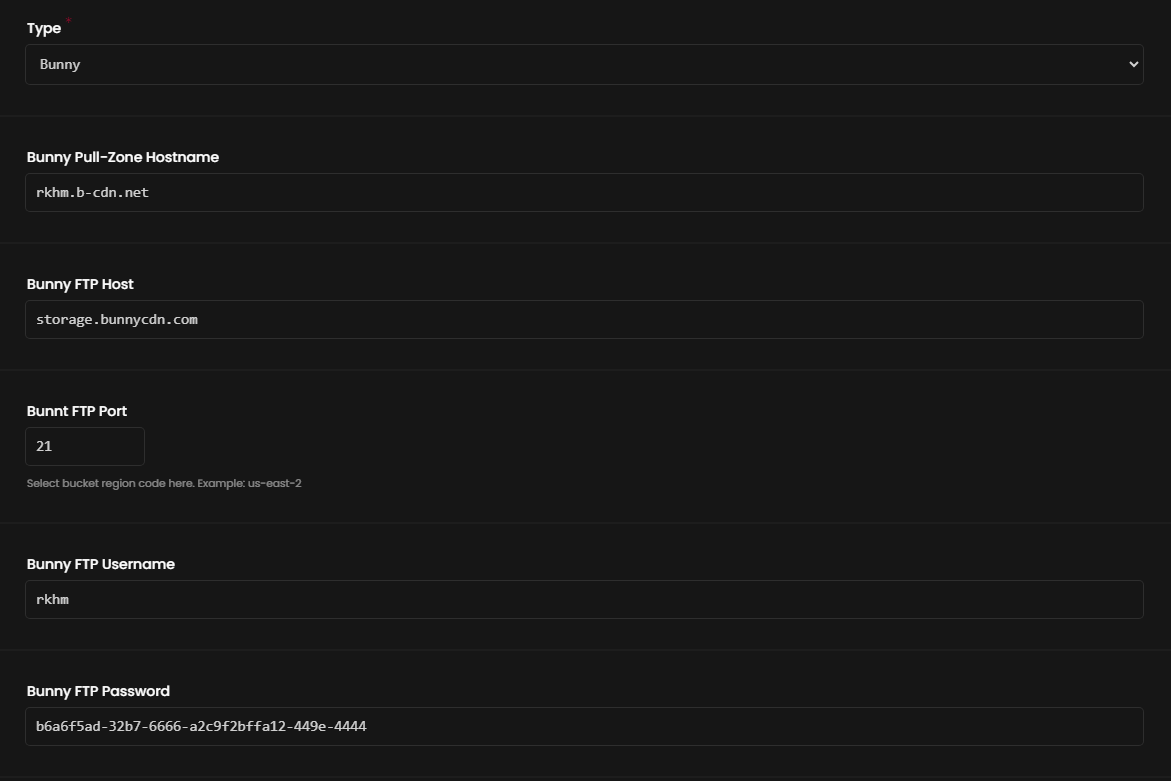
- You are redirected to a new page. Copy your hostname from Linked Hostnames. For example: rkhm.b-cdn.net
- If you wish to store HLS-encrypted on Bunny, you should visit your pull-zone, go to "Headers" setting page. Enable "Add CORS headers" and also append m3u8 and ts to "Extension list"
- Go to RKHM's `Admin -> Setting -> Files -> Storage Server` and click on `+ New Item`
- Enter any name, choose Bunny from `Type` option. Enter required information and click on `create`
- Go to RKHM's `Admin -> Setting -> Files -> Storage Setting` and set your new storage as default storage for ALL files or set it for whatever you like
How to add Storj?
- Create a new project. Select on Continue with web. Click on Generate passphrase. Save your passphrase and click on continue
- In your project page, go to Buckets page and create a new bucket. You can enter any name
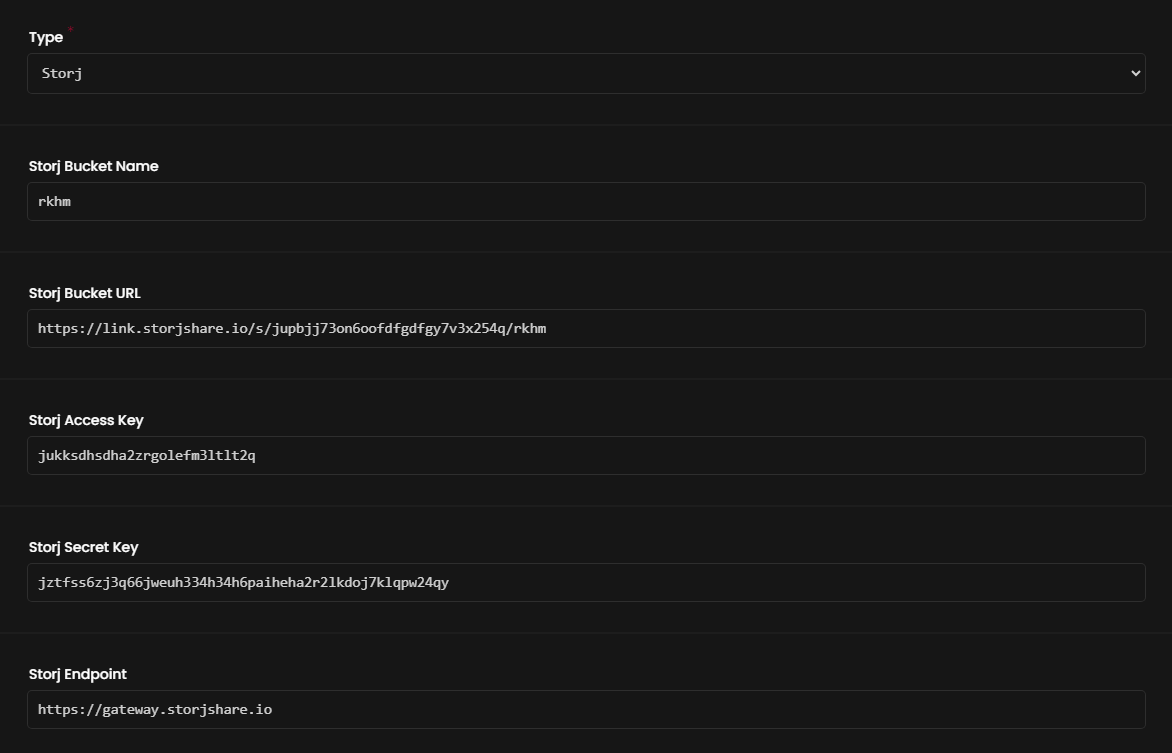
- Go to Access page and click on Create S3 Credentials. Enter any name, select S3 Credentials only, give all permissions and continue until your S3 credentials are presented too you. Copy Access key, Secret key & Endpoint
- Go back to Buckets page. Find your bucket. Click on 3-dots. Click on Share bucket. Copy your bucket URL
- Go to RKHM's `Admin -> Setting -> Files -> Storage Server` and click on `+ New Item`
- Enter any name, choose Storj from `Type` option. Enter required information and click on `create`
- Go to RKHM's `Admin -> Setting -> Files -> Storage Setting` and set your new storage as default storage for ALL files or set it for whatever you like
How to add Backblaze?
- Click on Create a bucket in your Backblaze dashboard. Enter any name. Select Public for Files in Bucket are: and disable Object Lock
- After you bucket is created, find it in Buckets page, find and copy Endpoint then click on CORS Rules. In pop-up, either enter your website address or select Share everything in this bucket with every origin and update rules
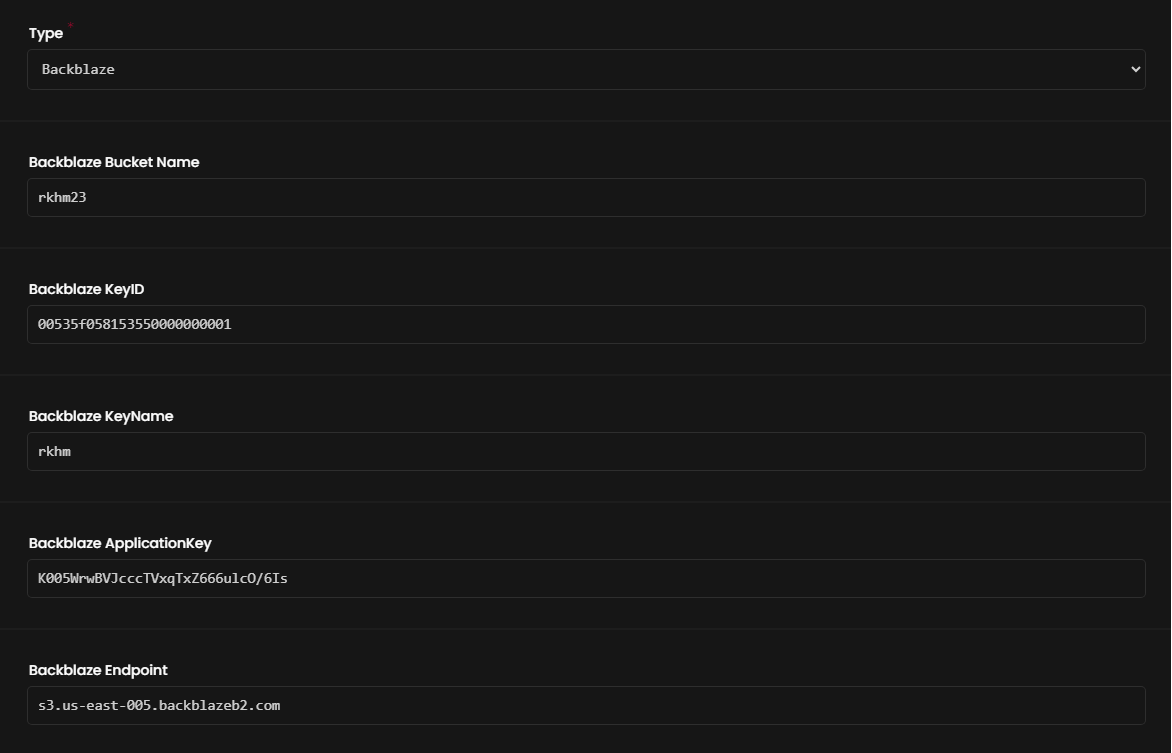
- Go to Application Keys page and click on Add a New Application Key. Enter any name and click on Create new key. Copy keyID, keyName and applicationKey
- Go to RKHM's `Admin -> Setting -> Files -> Storage Server` and click on `+ New Item`
- Enter any name, choose Backblaze from `Type` option. Enter required information and click on `create`
- Go to RKHM's `Admin -> Setting -> Files -> Storage Setting` and set your new storage as default storage for ALL files or set it for whatever you like
How to add Cloudflare R2?
- Get your Access Key ID, Secret Access Key & User-ID. Docs
- Go to RKHM's `Admin -> Setting -> Files -> Storage Server` and click on `+ New Item`
- Enter any name, choose Cloudflare from `Type` option. Enter required information and click on `create`
- Go to RKHM's `Admin -> Setting -> Files -> Storage Setting` and set your new storage as default storage for ALL files or set it for whatever you like
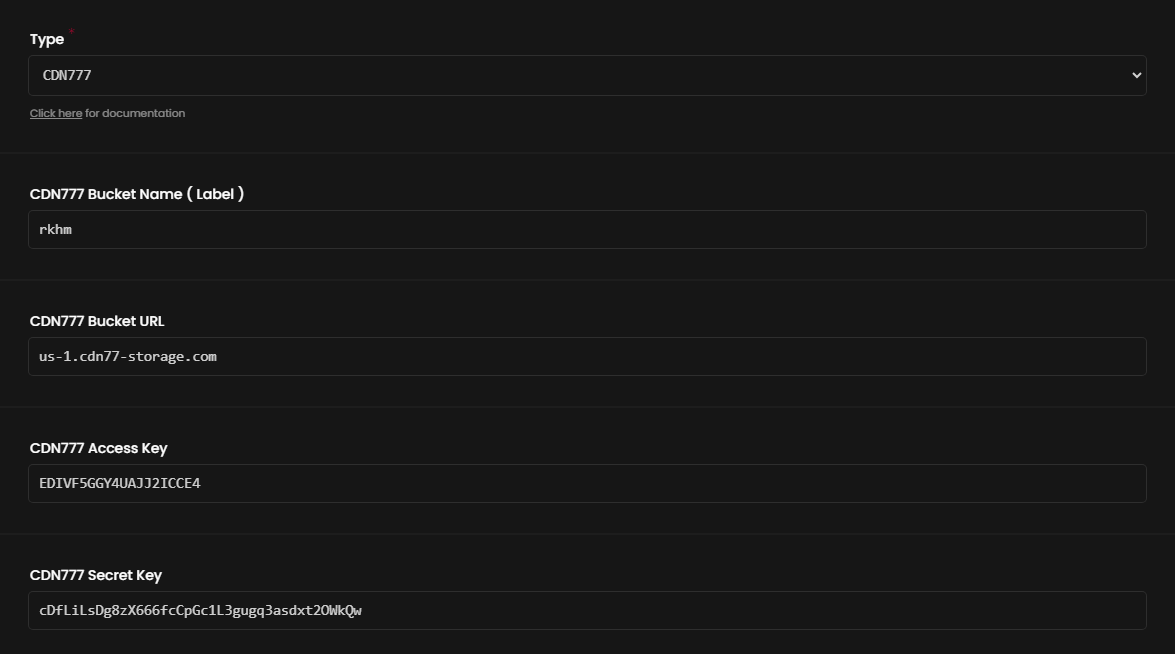
How to add CDN777?
- Visit Origins page in your cdn777.com account. Select CDN77 Object Storage and click on Create new object storage. Click on Continue. Enter anything as Label and choose the region closest to your clients location. Copy Access key & Secret key. Visit CDN77 Object Storage, find your bucket, click on it and copy URL
- Go to RKHM's `Admin -> Setting -> Files -> Storage Server` and click on `+ New Item`
- Enter any name, choose CDN777 from `Type` option. Enter required information and click on `create`
- Go to RKHM's `Admin -> Setting -> Files -> Storage Setting` and set your new storage as default storage for ALL files or set it for whatever you like
How to add MinIO?
- Install MinIO on your server/cloud ( Many guides available online, unrelated to RKHM )
- Visit MinIO Console ( Usually http://your-server-ip:9001 )
- Create a new user and give it readWrite access
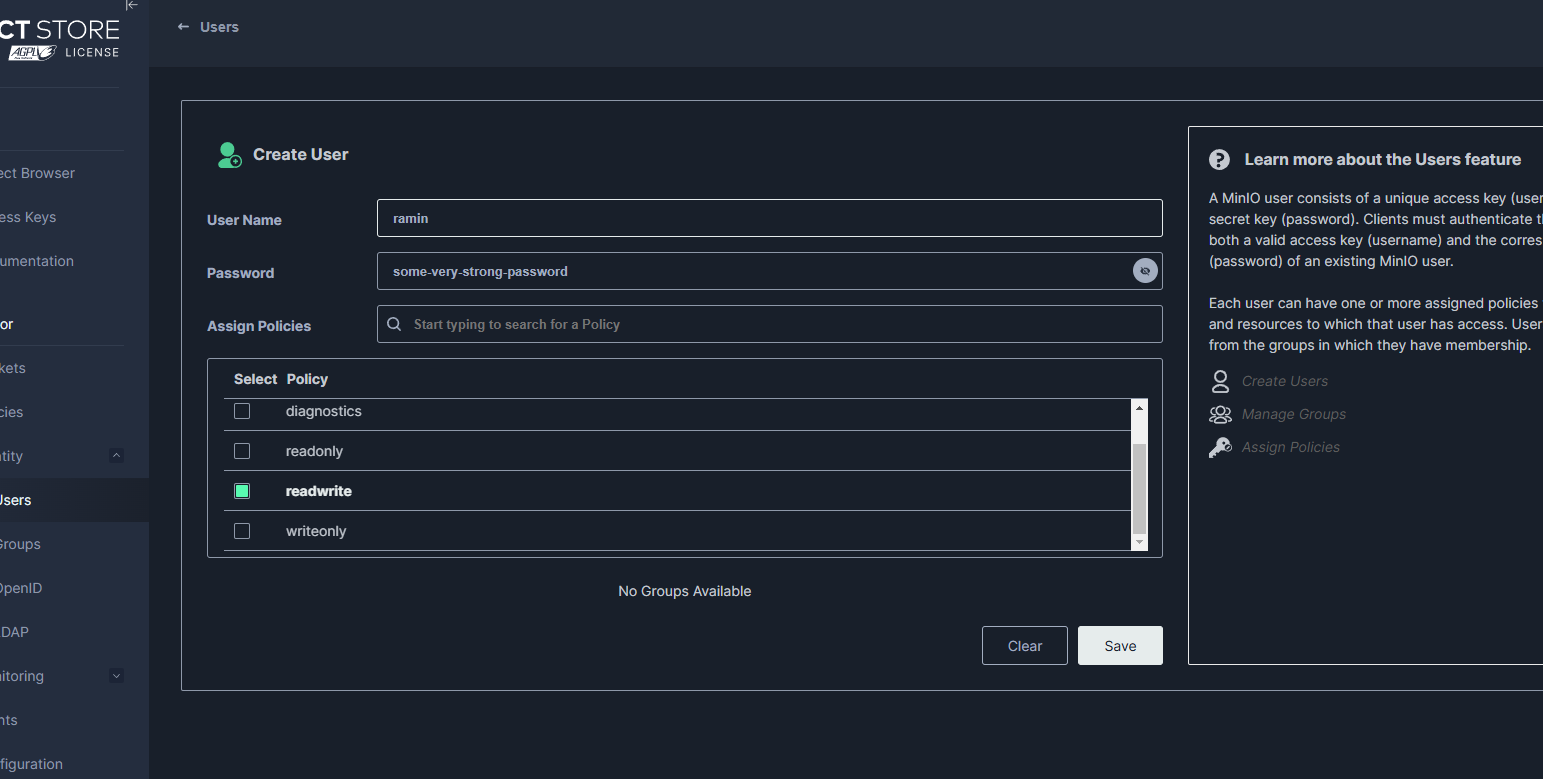
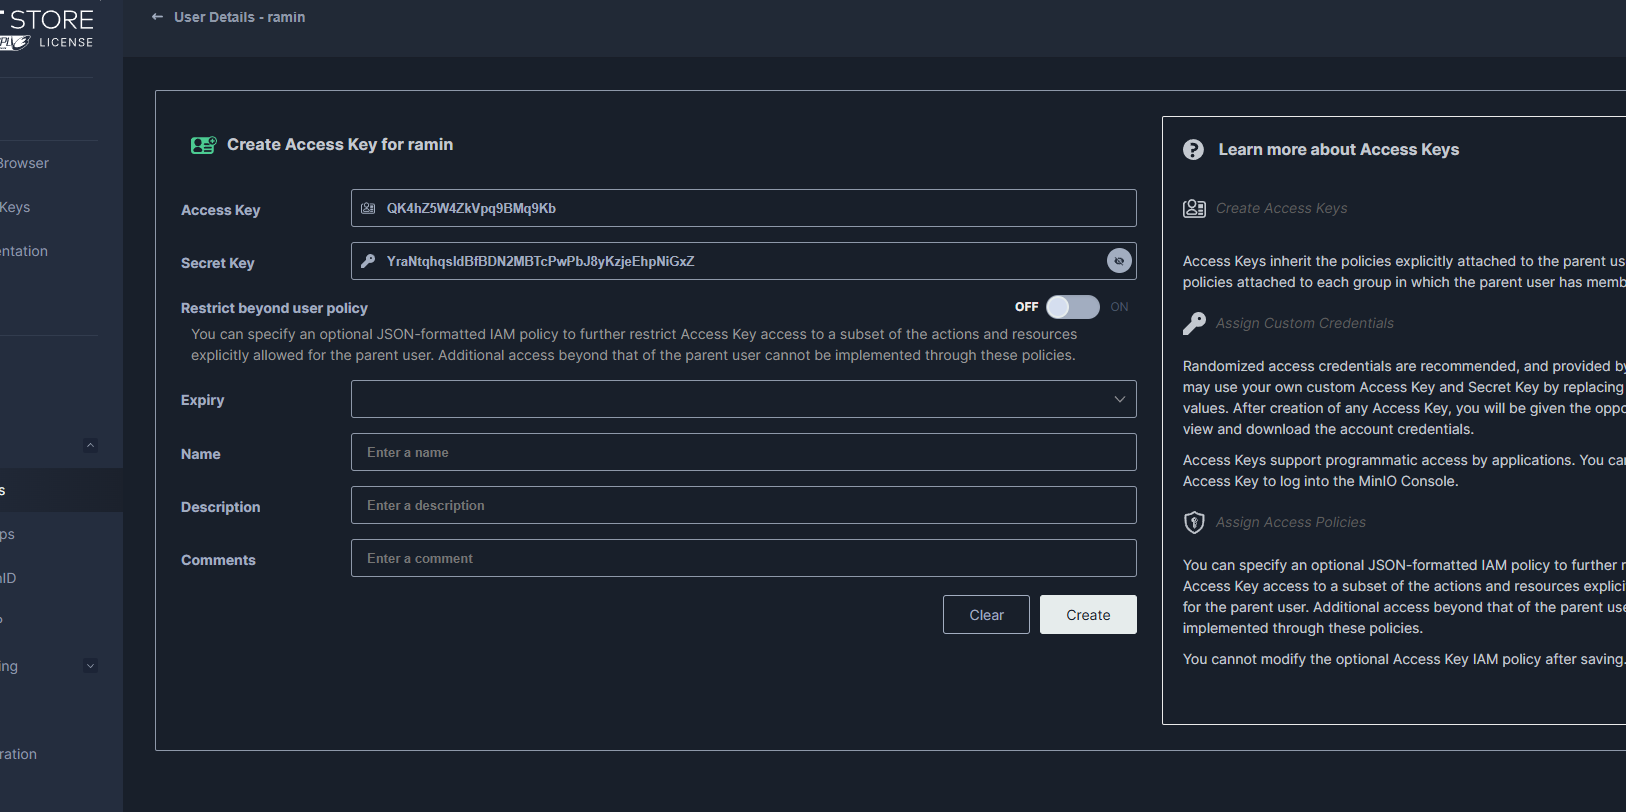
- Edit newly created user. Select Service accounts
- Click on Create Access Key and create credentials for user ( Don't forget to copy them! )
- Now create a new bucket ( copy the name )
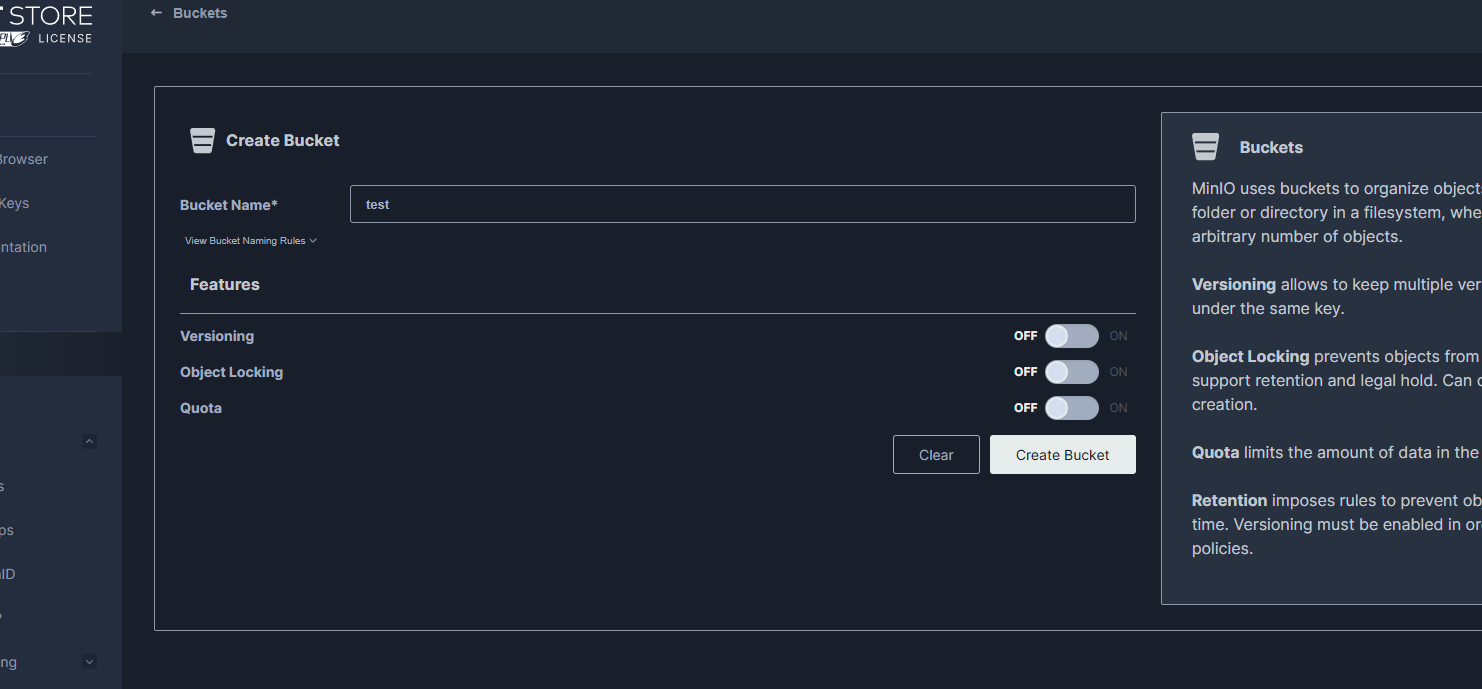
- Edit newly created bucket
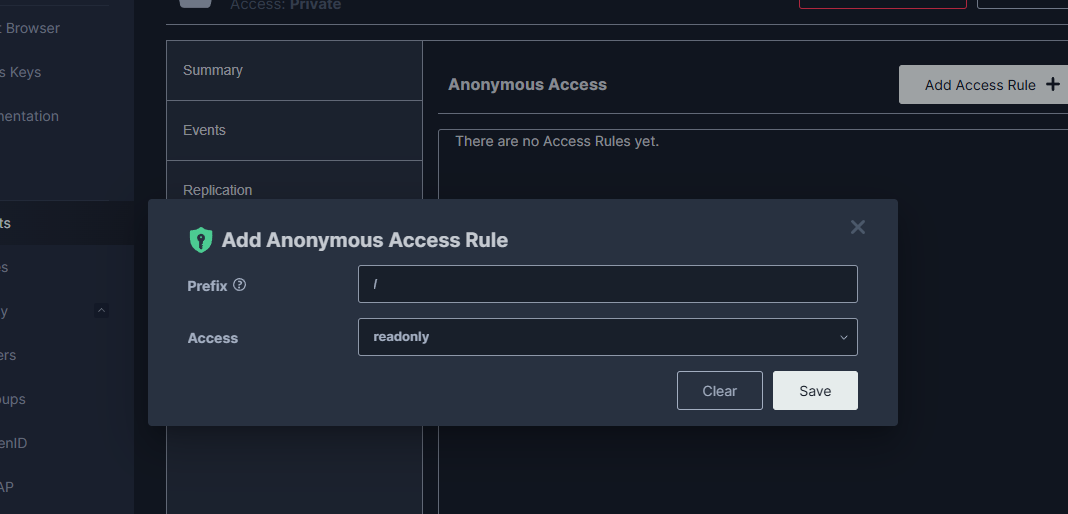
- Select Anonymous Access and click on Add Access Rule
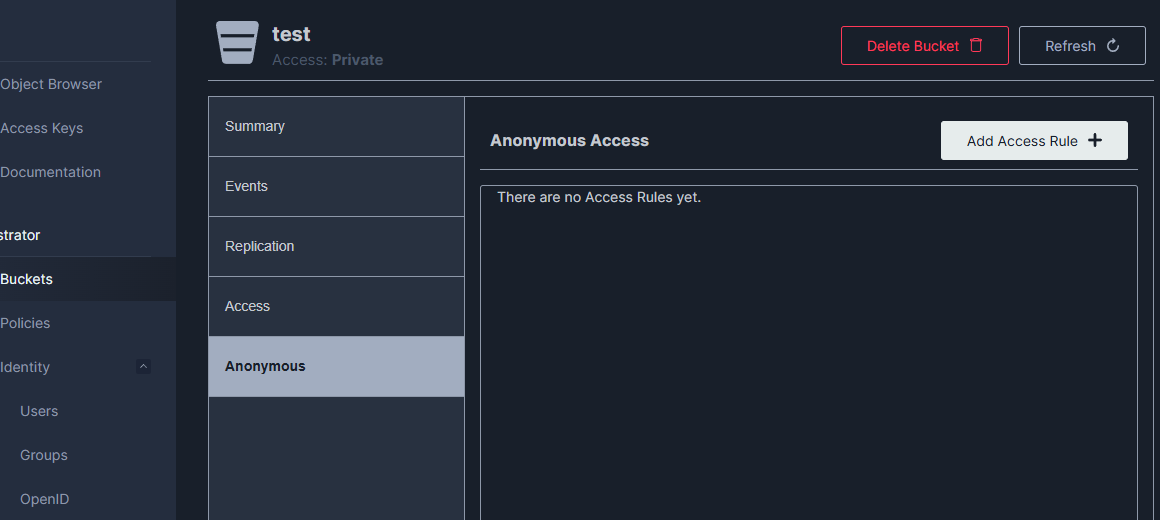
- Enter / as Prefix
- Select readonly as Access
- Click on Save
- Go to RKHM's `Admin -> Setting -> Files -> Storage Server` and click on `+ New Item`
- Enter any name, choose MinIO from `Type` option. Enter required information and click on `create`
- Your MinIO URL probably is http://your-server.com:9000
- Go to RKHM's `Admin -> Setting -> Files -> Storage Setting` and set your new storage as default storage for ALL files or set it for whatever you like